¶ All Test Suites
¶ As a Client, Tester, Analyst, PM
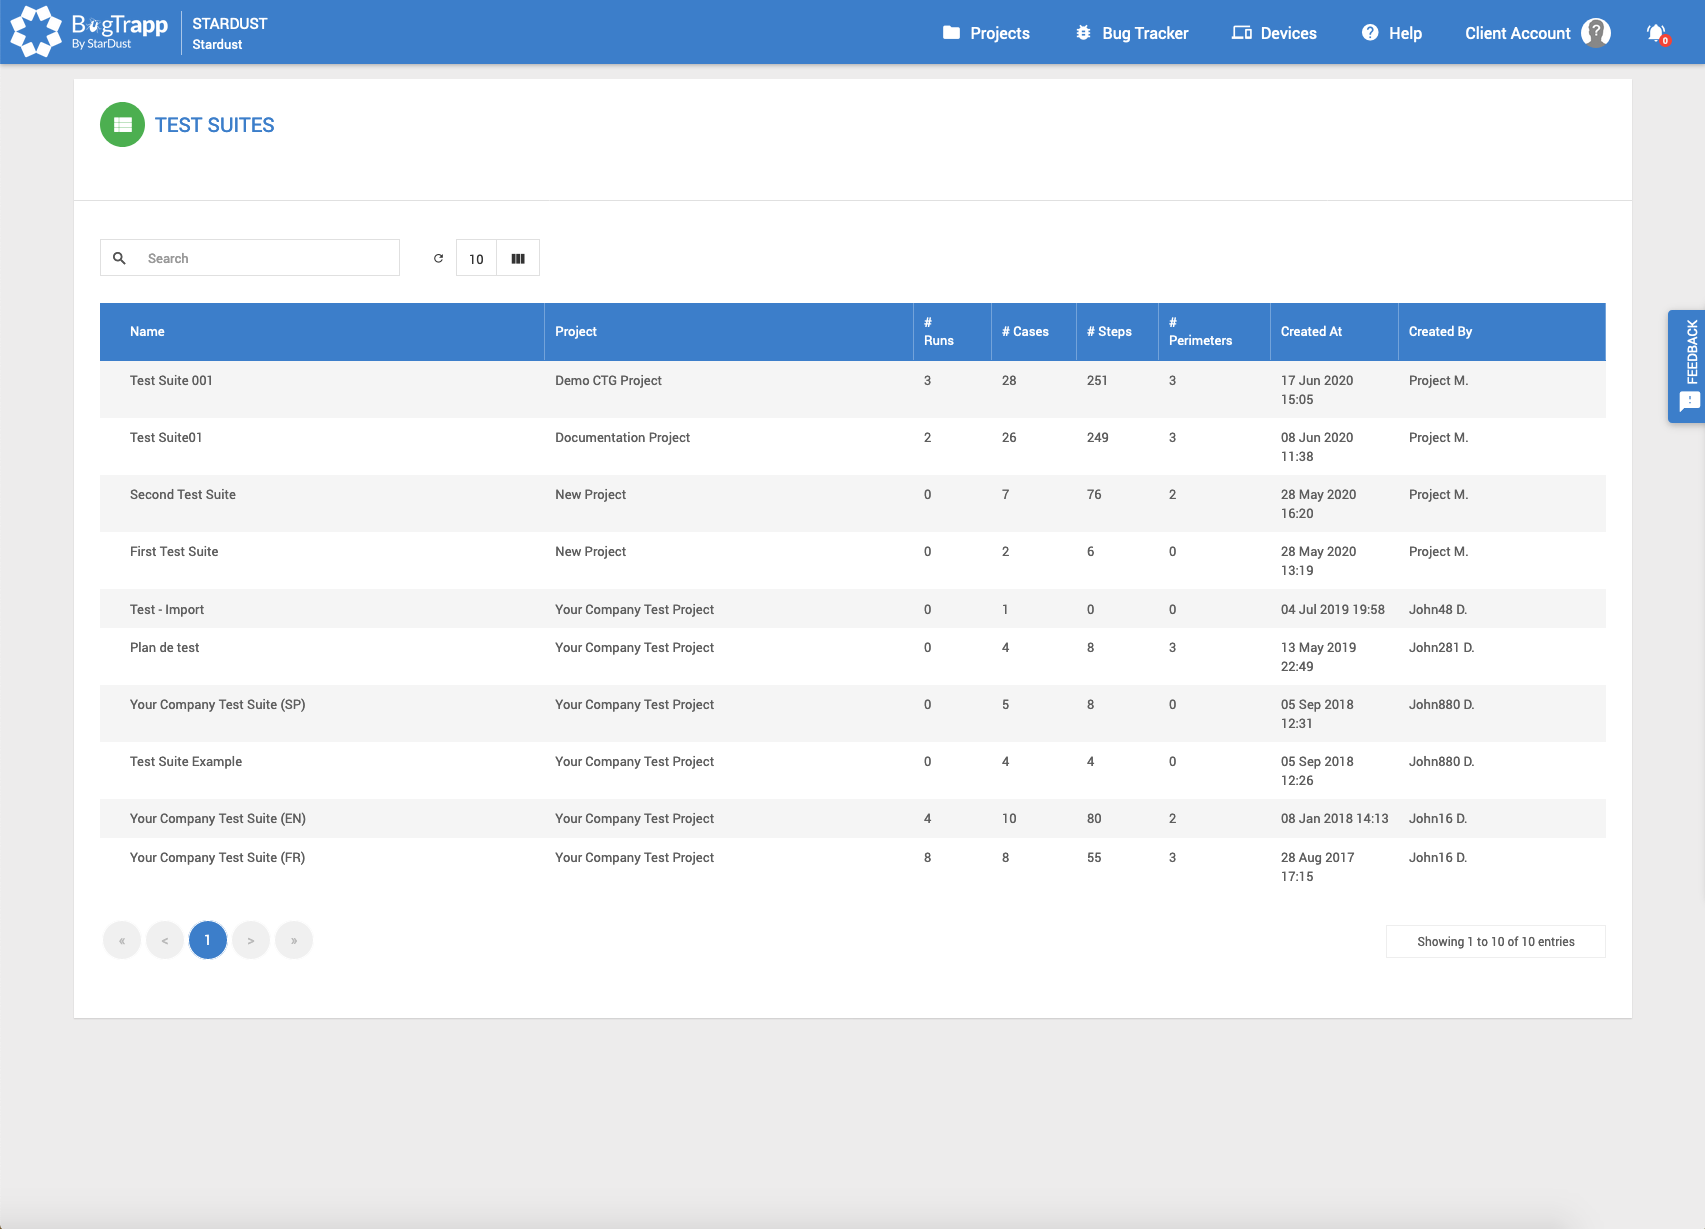
On the TEST SUITES page, you will find a table listing all the Test Suite projects to which you are attached.
You can use the search field to find a specific Test Suite.
You can use the table tools to decrease/increase the number of rows, and show/hide columns.
You can click on the header of a column to sort its contents in ascending/alphabetical order.
Click on a Test Suite to see its details. (→ Test Suite Details)
¶ Test Suite Details
¶ As a Client or Tester
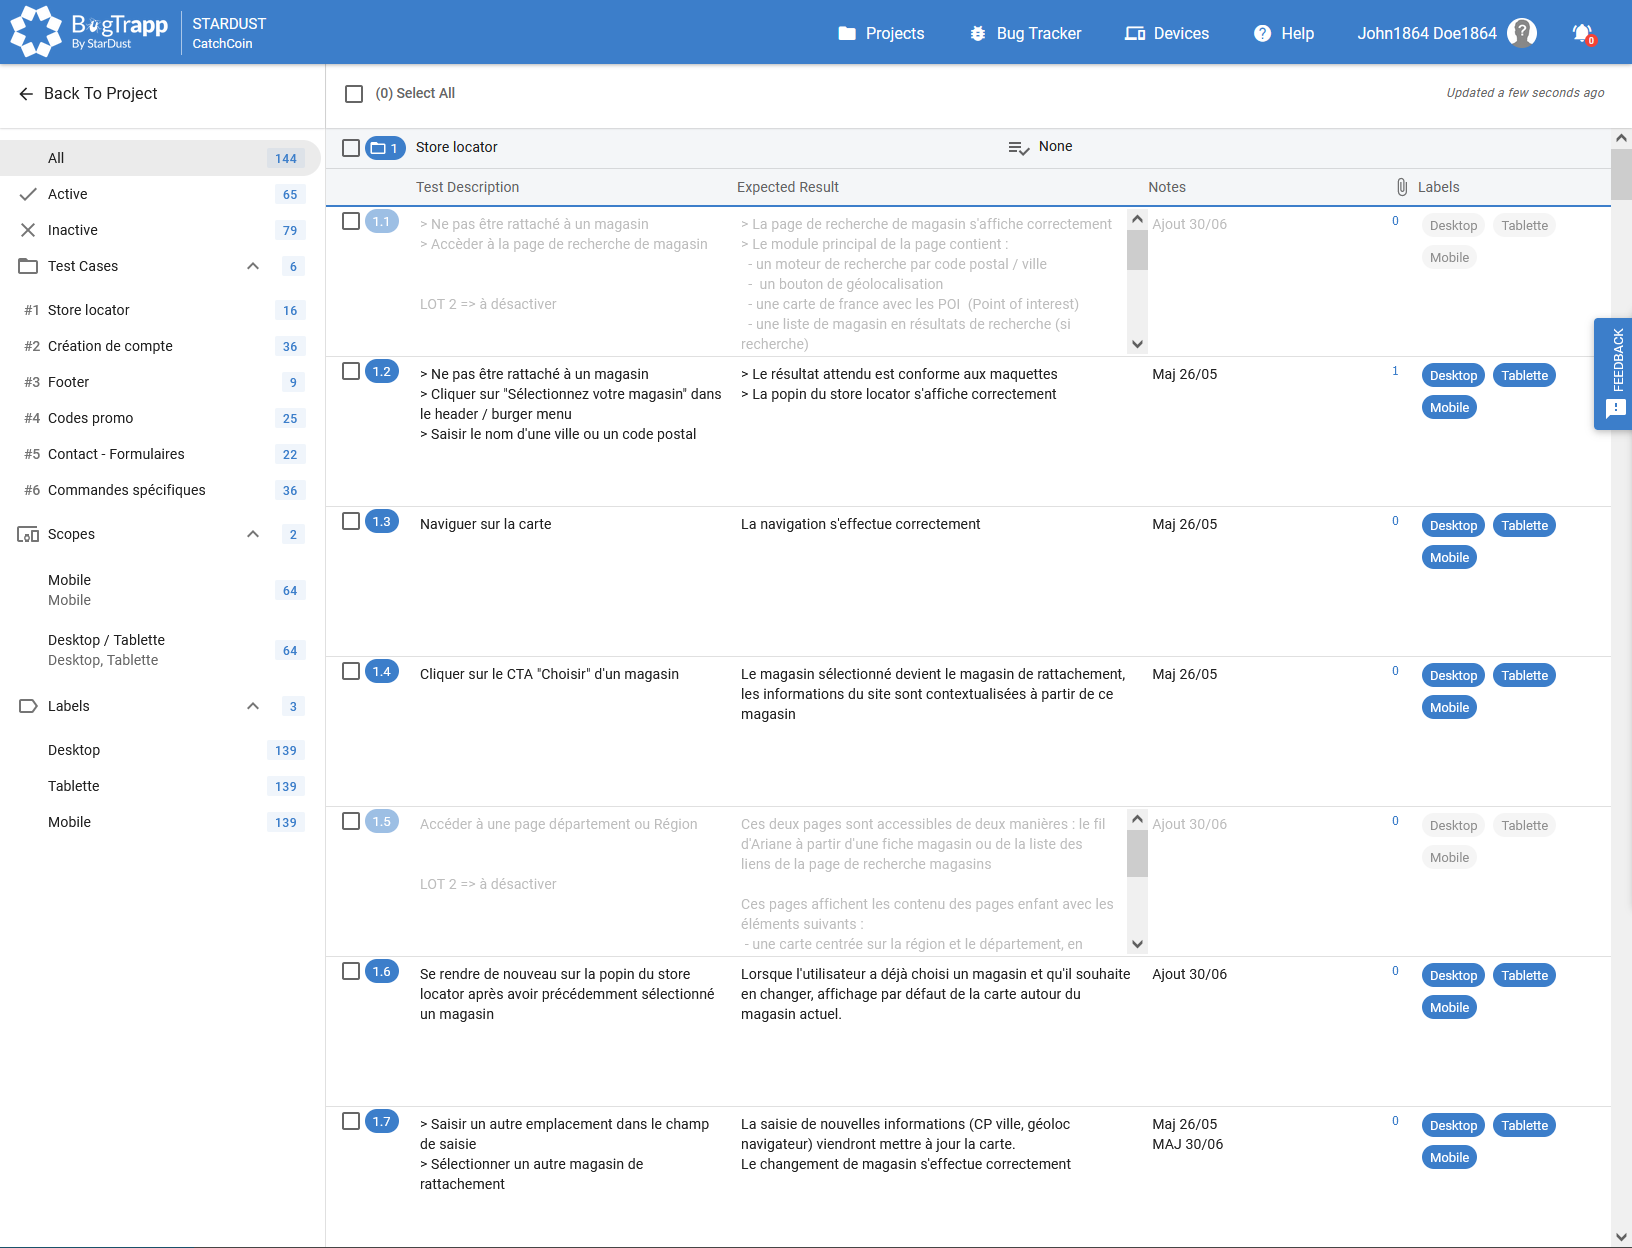
On this page you can see the selected Test Suite.
The page is composed as follows:
Top left under the Header of the site is the Back To Project button in order to return to the project in which this Test Suite is located.
Below this is the Test Suite navigation menu.
The All, Active and Inactive filters are displayed by default so that you can filter the active, inactive or Test Suite-wide Test Cases/Steps. Below this are the Test Cases, Scopes and Labels sections, which contain a list of these items and can be folded/unfolded using the associated arrow. In the same way as for the default filters, you can filter the Test Cases/Steps view by clicking on one of the items (Test Case, Scope or Label).
To the right of each line is an item counter.
Below the site header is the toolbar. The following items are displayed:
- Select all steps and Test Cases
- Information on the date and time of the last update of the Test Suite
Below the toolbar is the Test Suite containing the Test Cases, which in turn contain the test steps (except in the case of an empty Test Suite, containing only a placeholder).
For each new, empty Test Case created, another placeholder is displayed.
Each Test Case displays the test steps in 5 columns: Test Description, Expected Result, Notes, Attachments and Labels.
Each step row contains the following items:
- Check box
- Step number
- Text field corresponding to the column Test Description
- Text field corresponding to the Expected Result column
- Text field corresponding to the Notes column (This note will NOT be displayed for testers in a Test Run)
- Number of Attachments associated with this test step. Click on the number to open the Attachments Pop-In.
- Each Label is displayed in the last column.
¶ As an Analyst, PM

You can view the Test Suite (empty if newly created) from this page. As an Analyst, you will have access to the following additional actions and informations.
In the navigation menu of the Test Suite :
By moving the mouse pointer over the item counter in front of the Test Cases, Scopes or Labels items, the counter changes to (+) allowing you to create a new item in the desired item. Thus on an empty Test Suite, your first action will be to create a Test Case by this means (or via the placeholder button located in the centre of the page of an empty Test Suite). By hovering the mouse pointer over the item counter in front of a Test Case, the counter changes to (...) More options and provides access to the Edit (allows you to edit the Test Case, i.e. change the title and prerequisites), Duplicate (duplicates the Test Case) and Delete (deletes the Test Case and the included steps) actions. (...) More options acts in the same way for a Scope or a Label, but without the Duplicate action.
In the toolbar, a number of additional features allow you to modify the Test Suite:
- Duplicate one or more selected test steps
- Define labels for the selected steps
- Activate/deactivate the selected steps
- Delete the selection
- (...) More options containing the actions Refresh page, Import and Export Test Suite
Below the toolbar is the Test Suite containing the Test Cases and Test Steps (except in the case of an empty Test Suite, containing only a placeholder and a Create Test Case button).
Click on the create step button and a new line is created containing the elements of the step. The following additional options are available:
- Click on the number to open the Pop-In Attachments. Drag your files into the field or click on the image to browse the folders on your PC. Click on the Update button to add your image.
- By clicking on a label, it becomes active for this step (it turns blue). Click on the label again to deactivate it (it turns grey).
The saving of your Test suite is automatic, and is done at each edition (each time you click on a button, or leave a text field, i.e. on clicking out of that field).